BY TIM KING, PHOTOGRAPHY BY THE AUTHOR
500 Miles On A Tank Of Fuel?
Our 1955 Bel Air project we have some big plans for. We’ve dubbed it “50 In A 55” because we plan on driving this car to all 50 states – yes driving to Alaska and having it shipped to Hawaii as the final leg of the journey. With that much driving it’s going to use a lot of fuel. This car has an LS engine so it will get good MPG but we still plan on cranking out the miles in it.
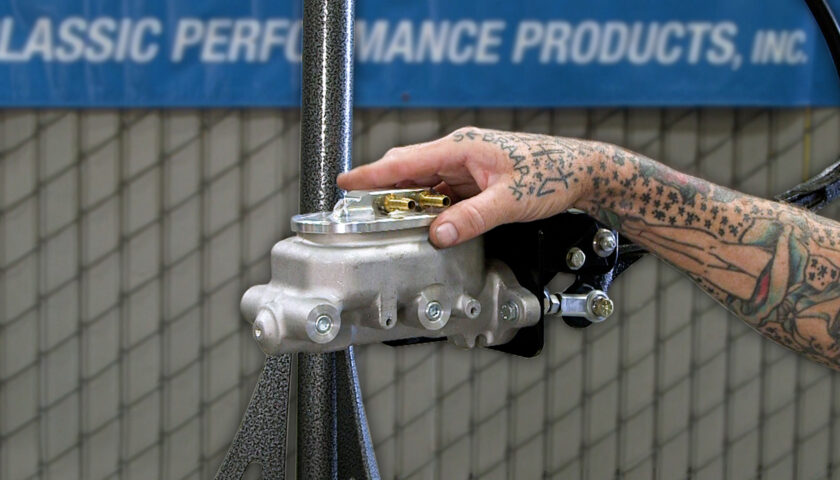
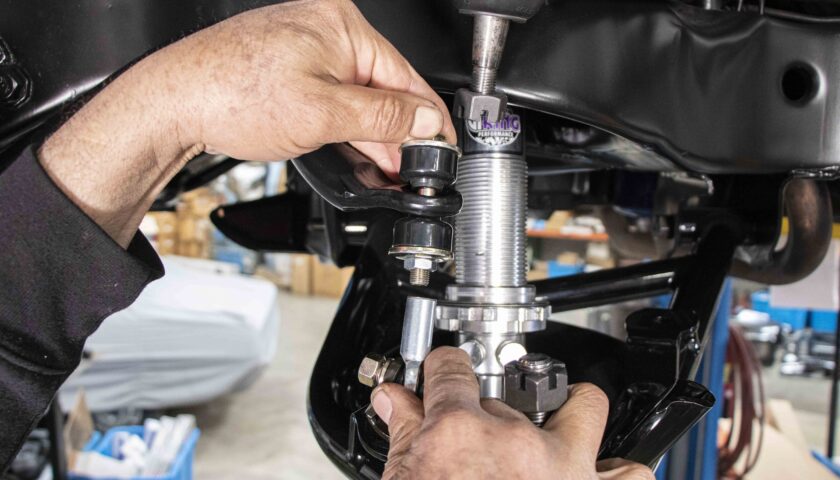
Related Story: Building a Restomod Tri-Five Chassis with All CPP Parts
The stock tank just wouldn’t suffice. For one it’s too small and two, no provisions for EFI. We could have went with a stamped reproduction that’s EFI ready, but we wanted more capacity. Luckily Classic Performance Products (CPP) started making high-capacity Pro Touring tanks for most applications.

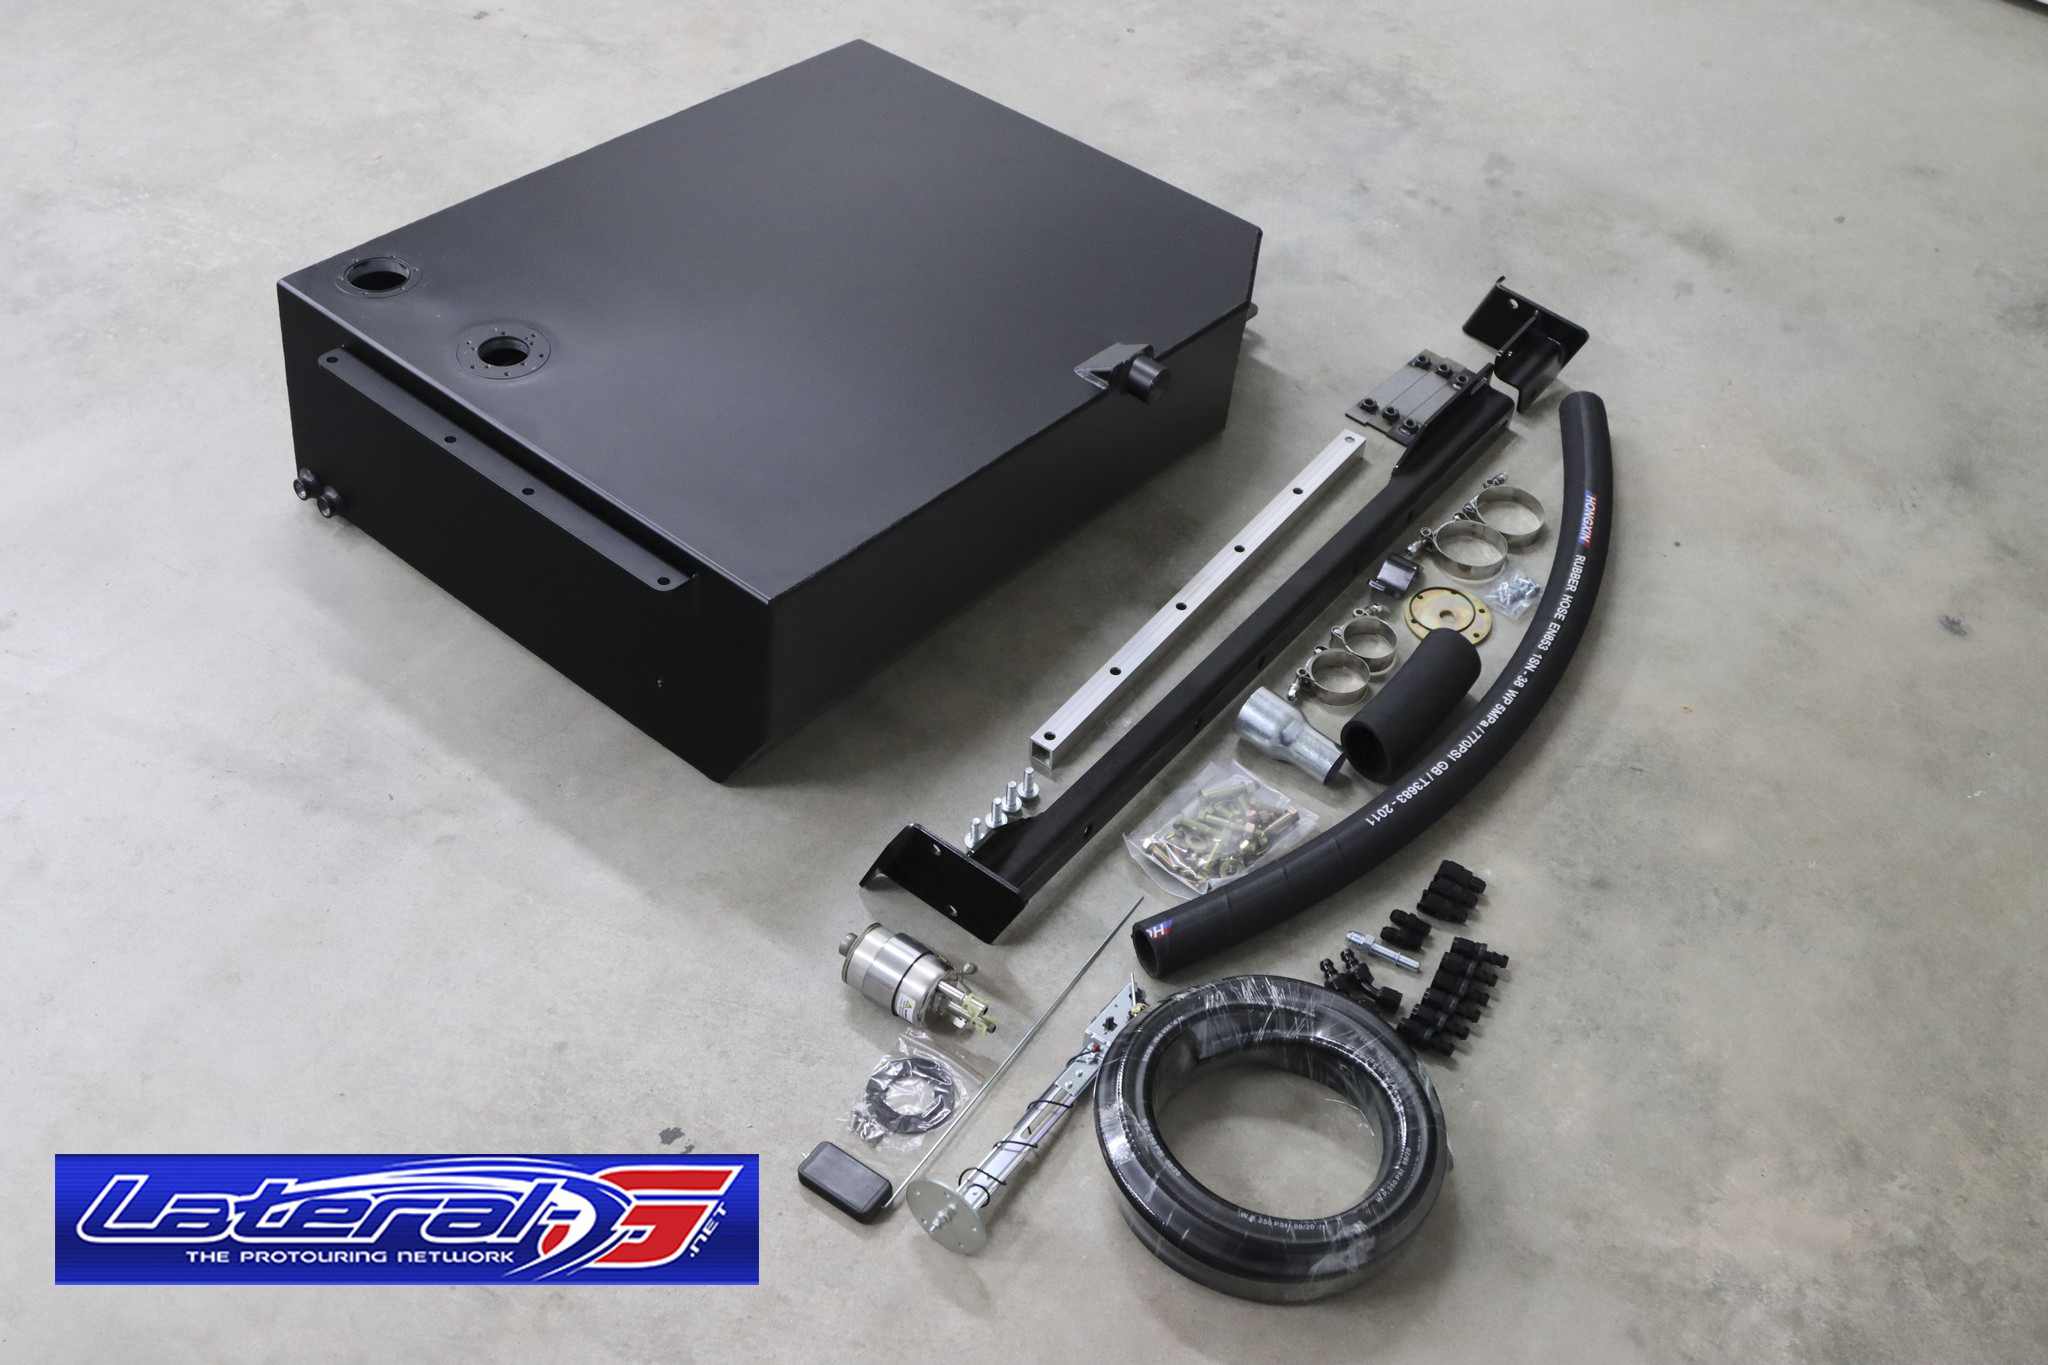
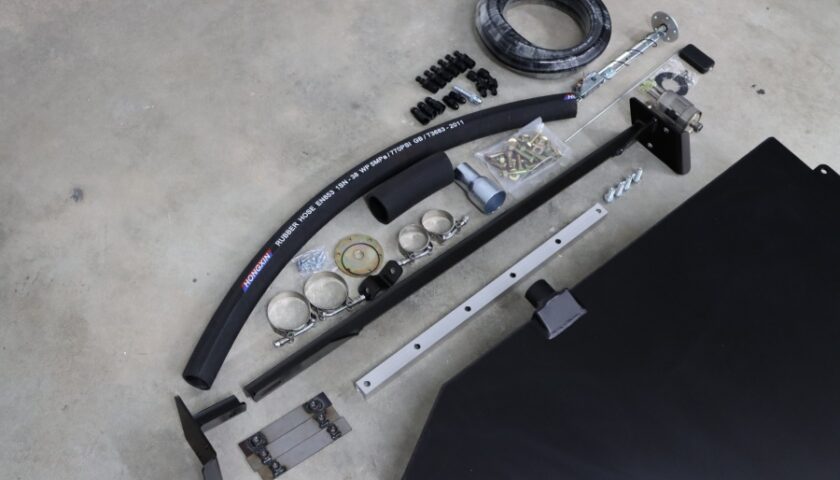
These tanks are made from 1/8″ thick aluminum and fully TIG welded and pressure tested. They have provisions for a high-pressure fuel pump, sending unit, and even ports if you’re still running a carb. They come in either raw or black powdercoat finishes. The best part is they have a 25 gallon and a 29 gallon version for the Tri-Five Chevrolets. The difference there is the smaller 25 gallon allows you to keep the spare tire well, and the 29 gallon version you have to remove it.
We opted for the 25 gallon version so we can use that spare tire well for storage and tools. With the stock tank being only 16 gallons, we now have 9 more gallons to increase the distance between stops. If the LS clicks off 20MPG, that’s an additional 180 miles on one tank of fuel! Our bladders will probably have to be emptied before we need to fuel up but having that extra reserve when doing long treks across the desert will be peace of mind. We figure with 26 gallons and if we can click off 20MPG that’s 500 miles on a tank of gas.
Give It All The Gas
Our car didn’t have the factory fuel tank installed. If yours does, it’s simple to remove. Simply unbolt the filler neck and slide that out of the way, disconnect the supply hose, and sending unit wire. From there the tank will drop down once you remove the two straps. You will have to remove the carriage bolts completely and the forward mounting brackets on the floor of the car. We aren’t entirely sure it’s necessary to remove those forward brackets, but we went ahead and removed them for extra clearance.
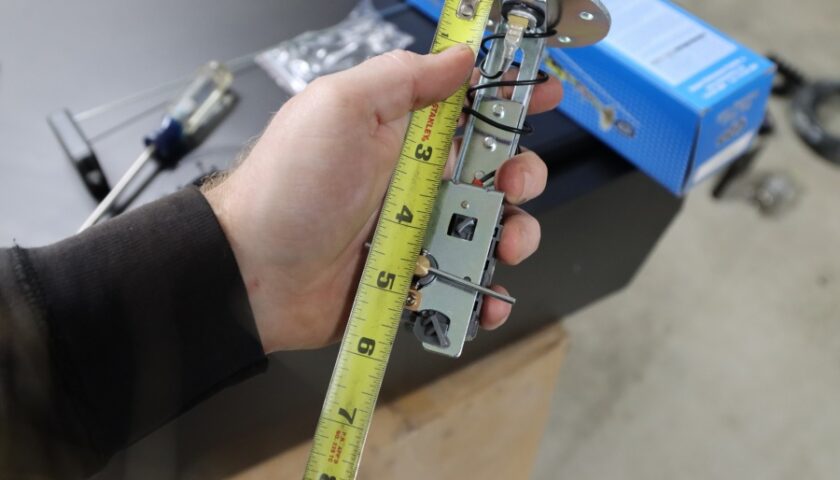
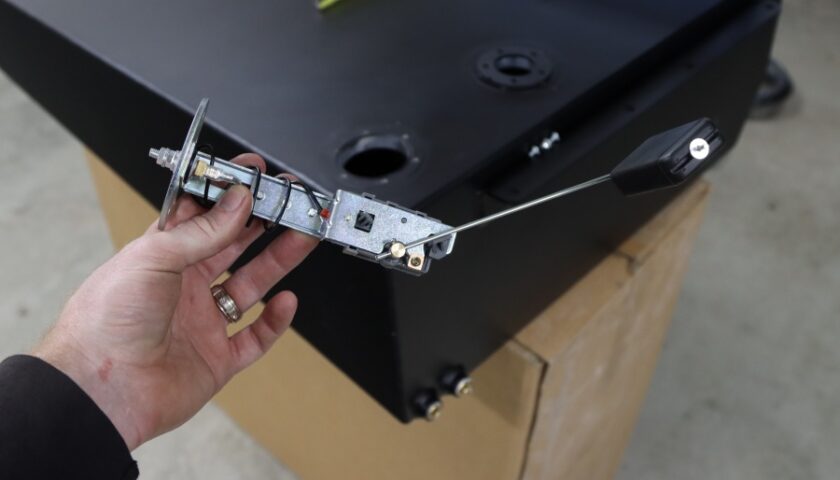
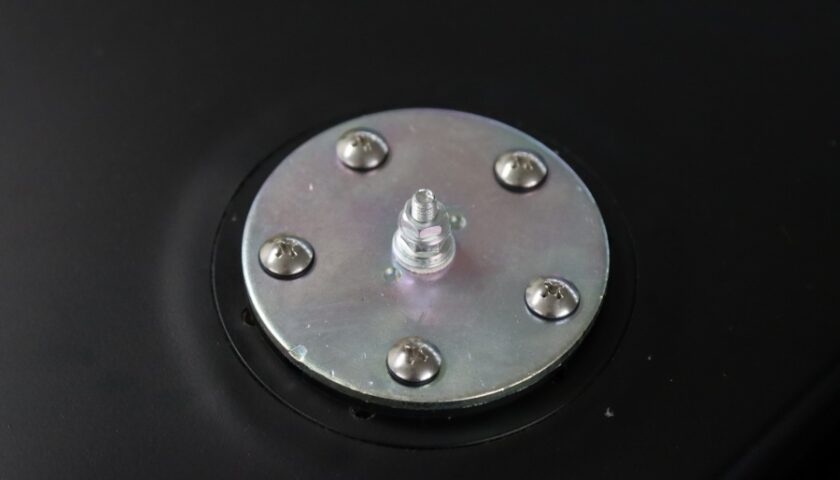
Before we could slide the new tank in it’s home, we had a little work to do. Our first step was to install the new sending unit. This was a piece of cake as you simply measure the depth of the tank, and follow the table in the instructions to set the correct length for the sending unit and the arm. Once we set the correct depth we then measured and trimmed the length of the arm before sliding it all into the tank and screwing it down.
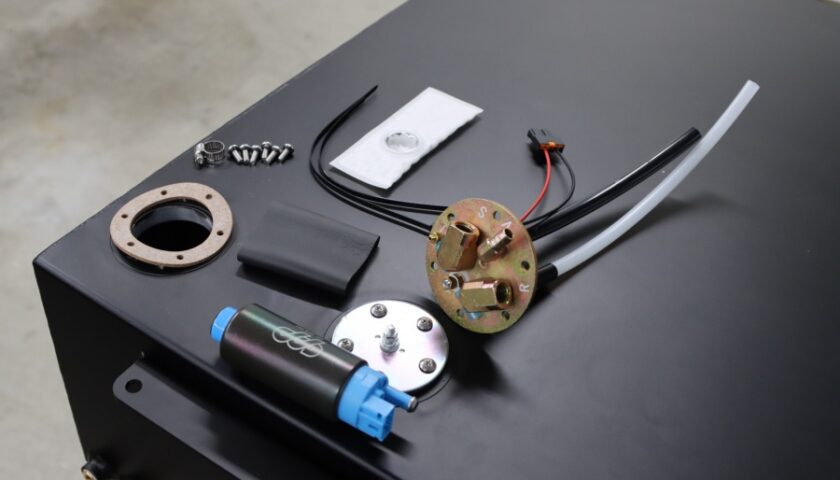

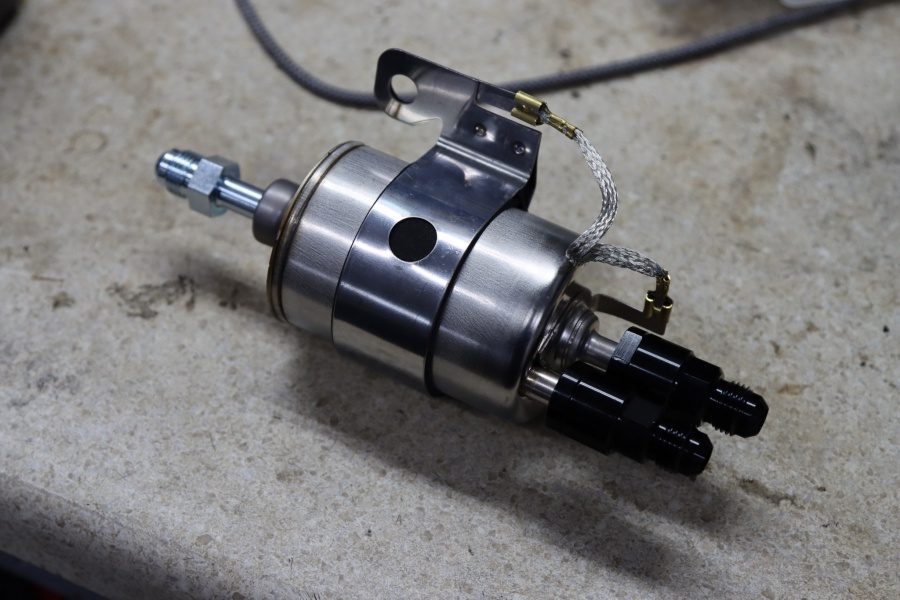
Installing the high-pressure fuel pump was almost as easy. Again we start by measuring the depth of the tank then trimming the supply hose and installing the 255LPH pump we picked up from CPP. We then slide the sock on the end of the fuel pump and trimmed the return hose shorter.
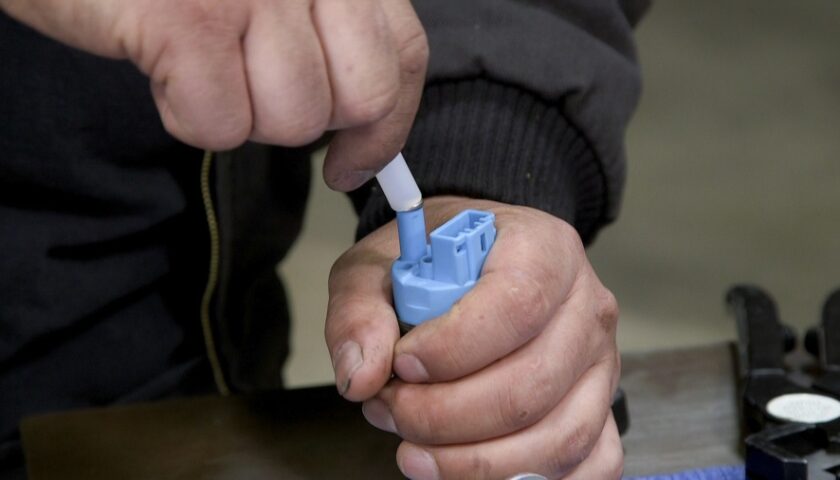
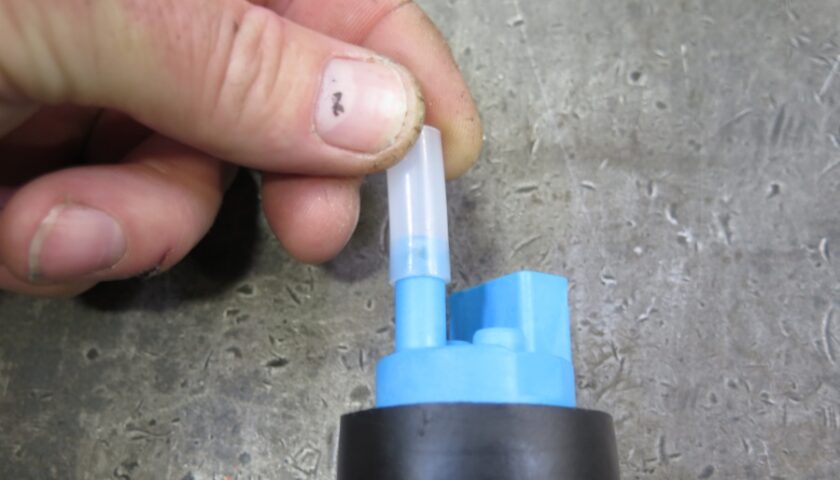
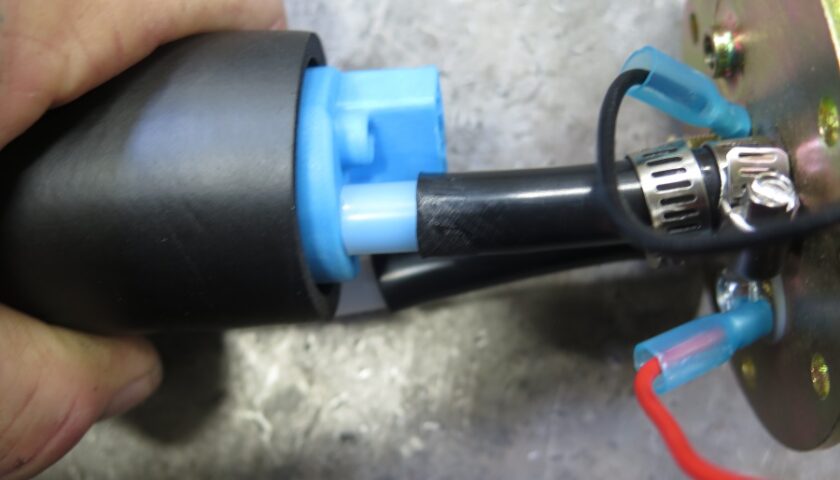
One thing we noticed is that the supply outlet of this fuel pump is smaller than the supply hose. In the instructions we saw that CPP had thought of this as well. Following the instructions we snipped about 1″ off the white return hose, which fits perfectly inside the black hose. Using a heat gun, we very gently warmed up the white piece of hose then slid it over the supply outlet on the pump. Then we warmed up the black hose a bit and slid it over the supply outlet. Then we added a hose clamp to secure it all for no issues.
The last step for the in-tank side of installation was to zip-tie the pump to the return hose so everything is supported.
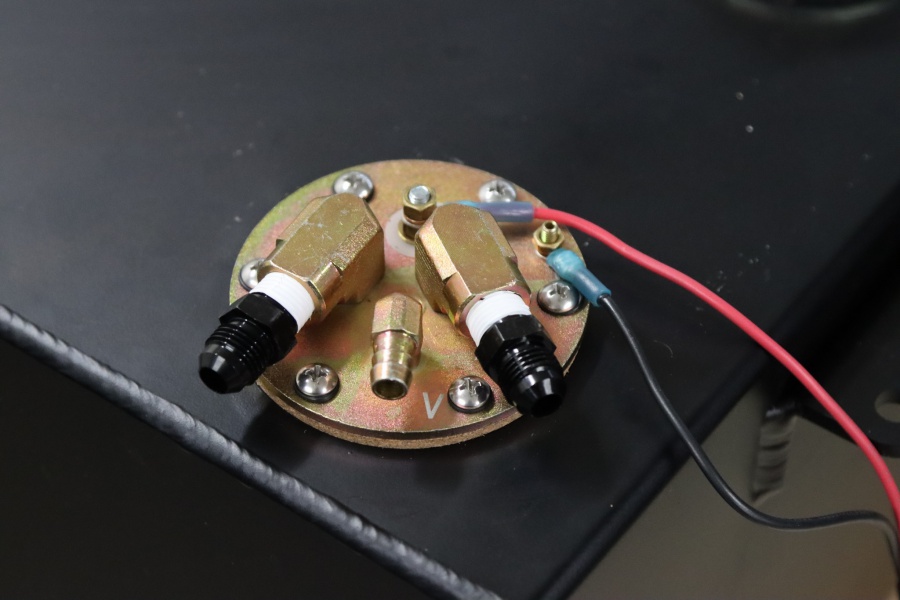
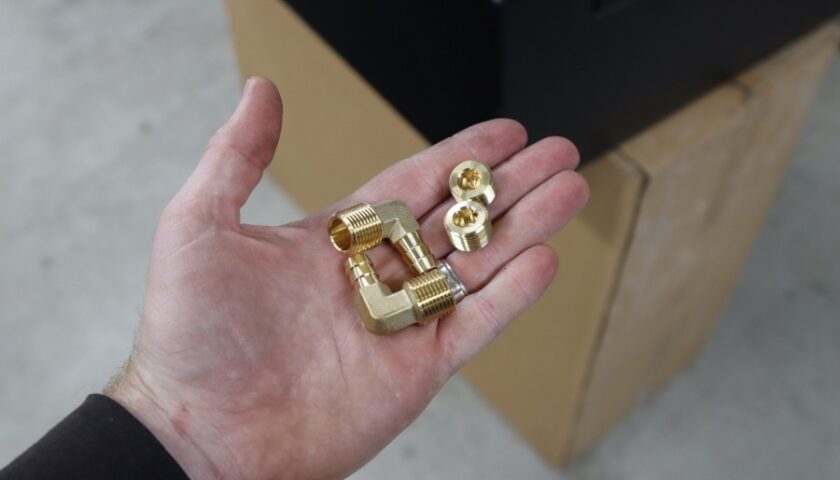
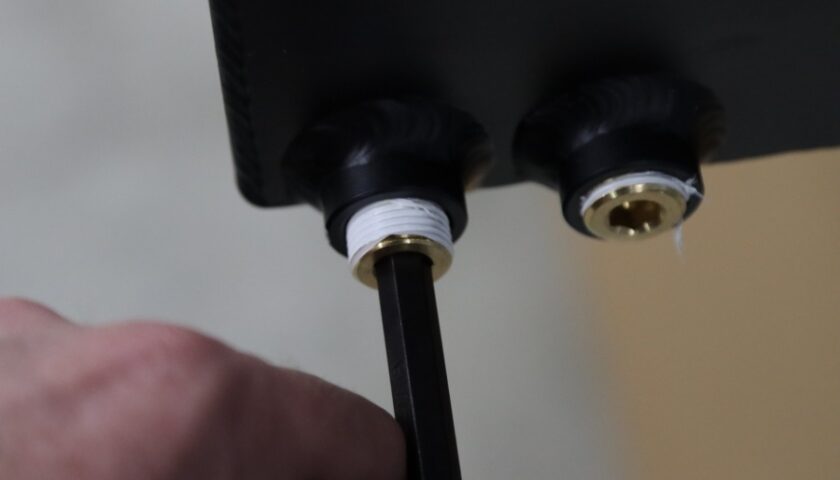
After sliding the pump into the tank we screwed it down. We added Hot and Ground lead wires at this point so once the tank is installed all we have to do is connect those to our Painless wiring harness. When we picked up this tank we also picked up one of their complete fuel installation kits. This kit came with all the AN fittings, high-pressure fuel hose, fuel pump, and filter/regulator combo. We grabbed the NPT to AN adapters and screwed those into the fuel pump housing, then connected the hose to it so it’s already installed.
Bolt-In Installation
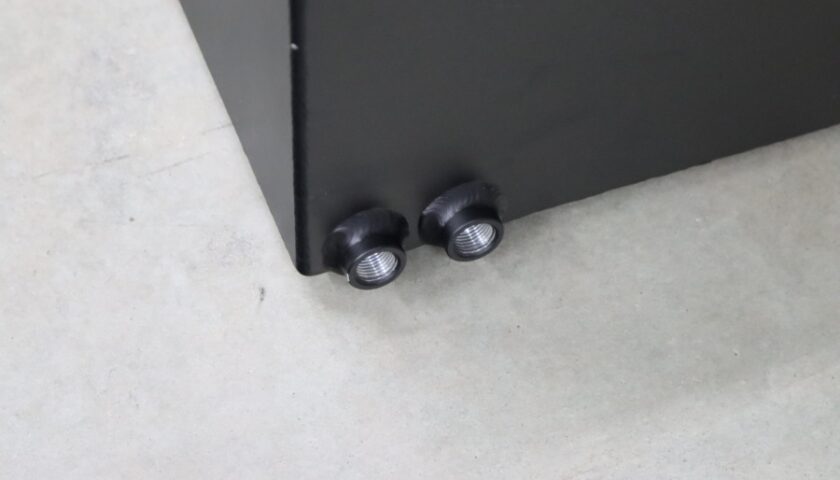
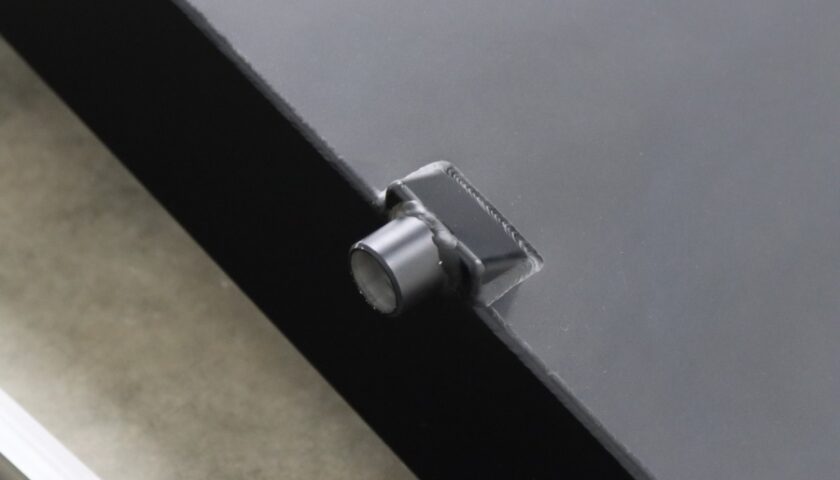
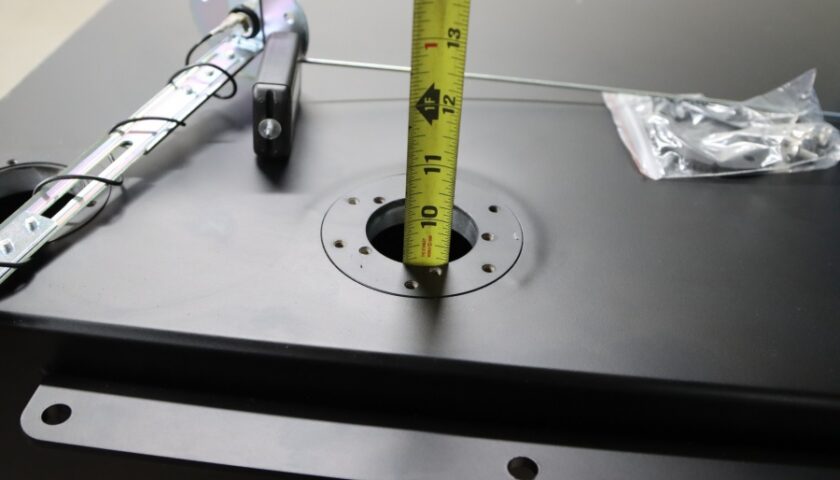
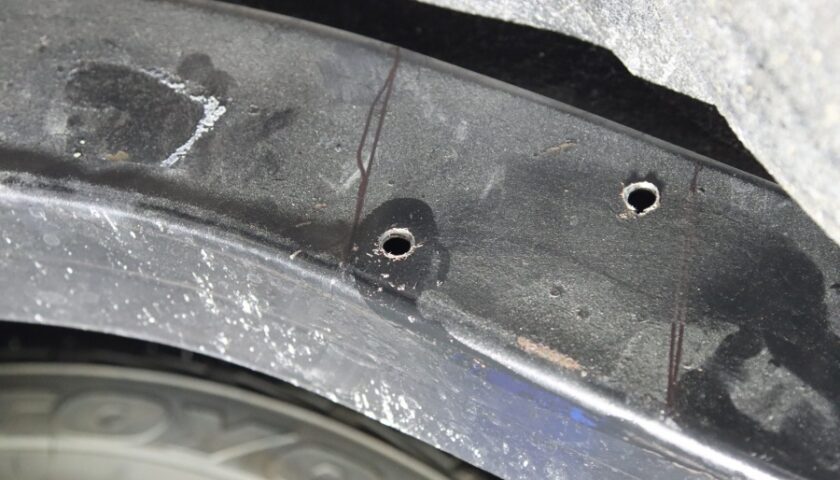
To get the tank in the car there’s a bracket that goes side-to-side in the front, and the rear of the tank attaches to the factory cross member. The front cross member is a two-piece deal that allows you to slide it apart to get just the right fit. What we did was roughly install that, then slid the tank up making sure it’s against the rear cross member. Then we marked the location of the cross member with a marker. After removing the tank and crossmember we drilled 5/16″ holes, two on each side, into the side of the frame.
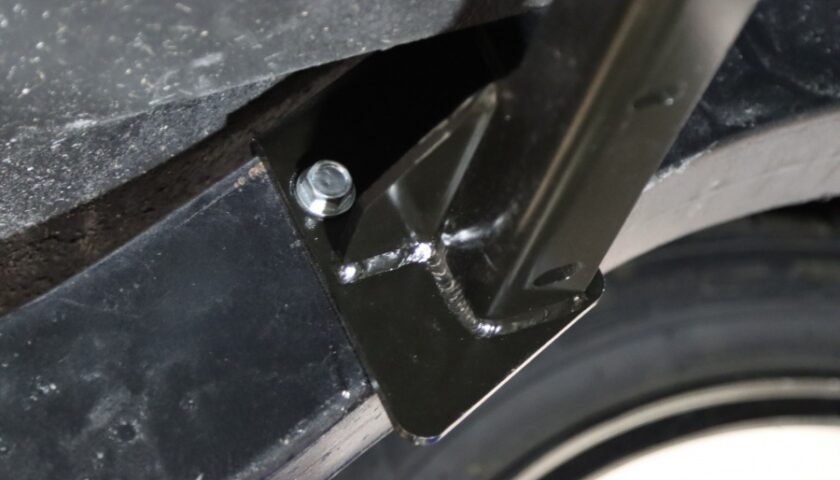
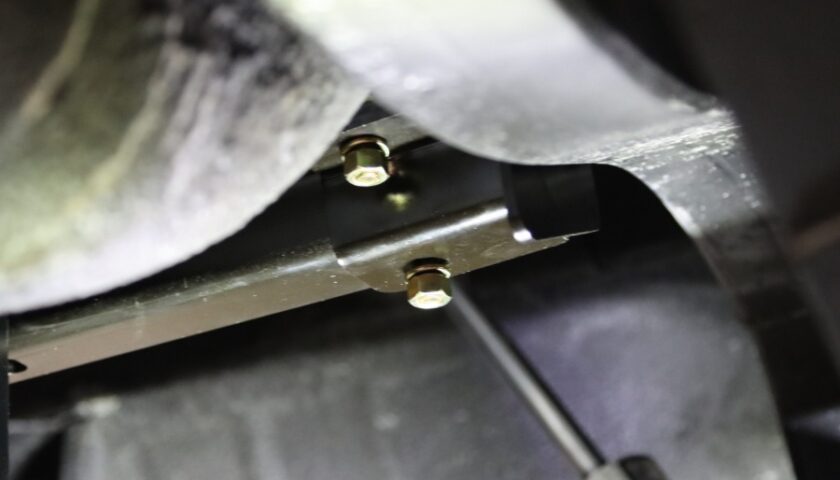
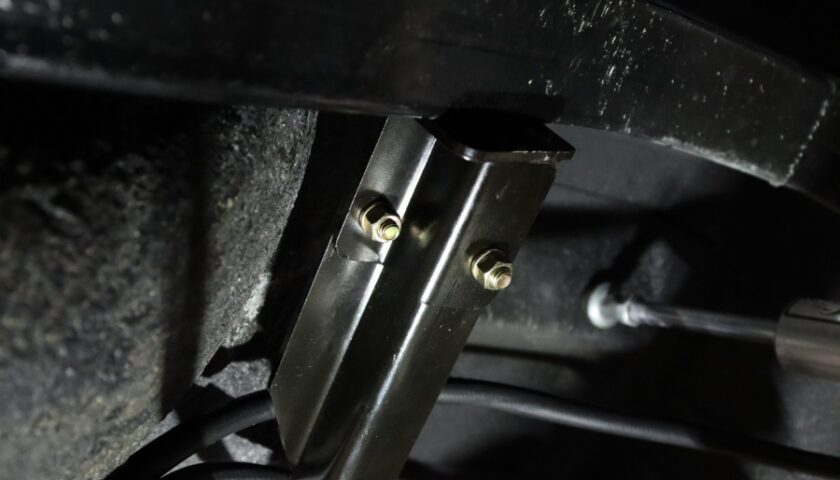
After sliding the cross member back into place we used the supplied self-tapping 3/8″ bolts to get the cross member fully installed. Lifting the tank back into place once more, we installed a few of the front bolts to hold it in place.

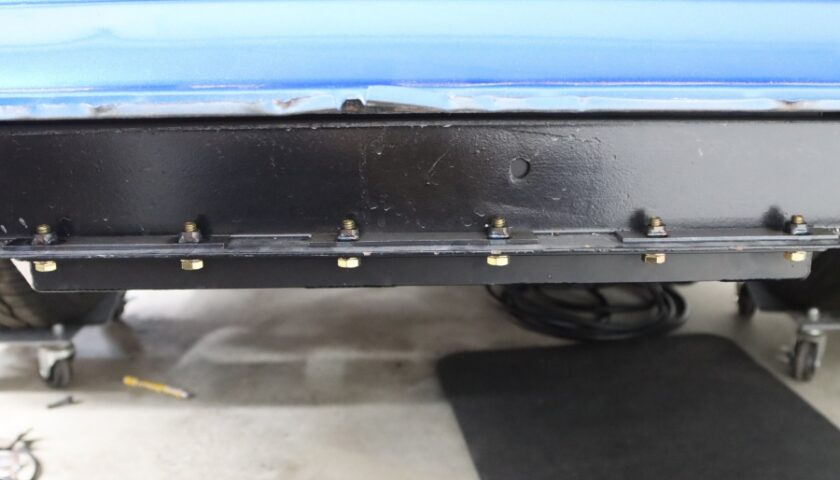
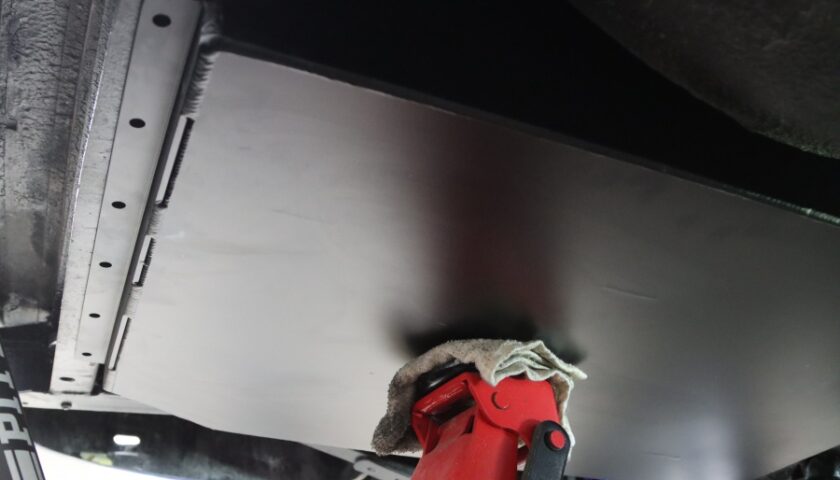
In the rear, we had to drill six 3/8″ holes to attach the tank. CPP supplies all the bolts and brackets that have nuts already welded to them to help spread the load. An easy process and once finished, the tank was permanently installed!
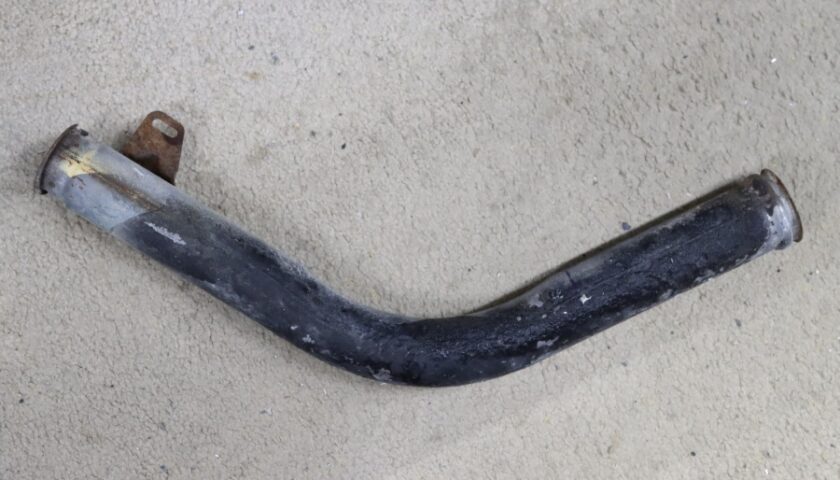
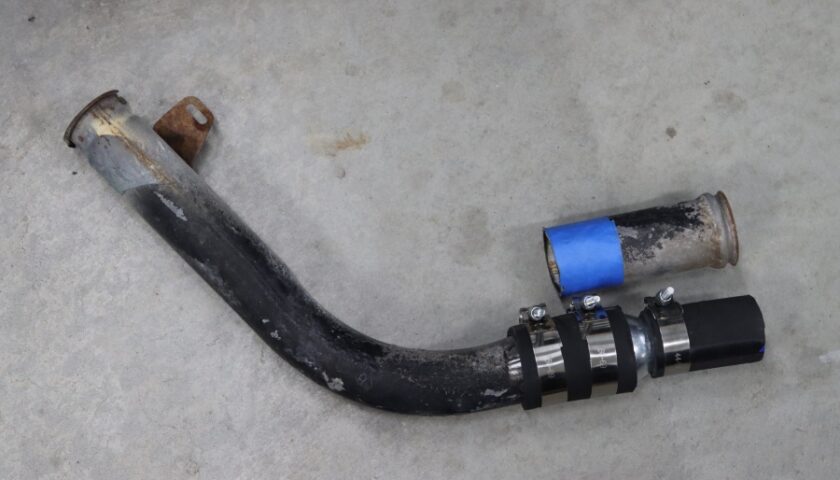
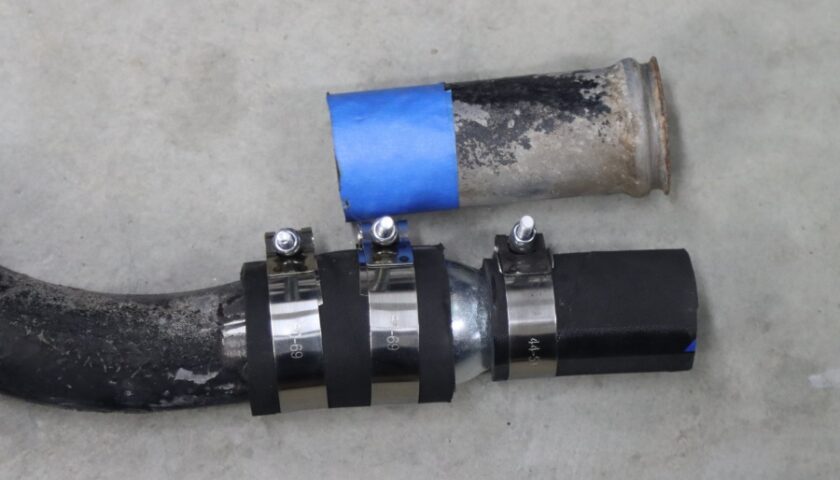
Our last major step was to reattach the fuel filler neck. The inlet size on the CPP tank is smaller than the factory tank, but they supply a reducer, hose, and clamps to change everything. The filler neck is in the exact same spot as factory, so we just needed to trim a bit off the factory filler neck and install the reducer. There’s over an inch of room between the tank and frame to get a socket in there to tighten down the clamp too, making this an easy process.
We initially thought being such a bigger tank that it might hang down low. In reality though this tank is tucked up tight and once we have the rear bumper on, you’ll be hard pressed to see it. From here we need to finish plumbing the fuel system – but we will save that for another story! Make sure to check back for that story. If you’re interested in this tank for your ride, or having any other questions, hop on ClassicPerform.com