There’s a lot of confusion around how to adjust Cadillac calipers the right way. To clear things up, we put together the above video and the below instructions. If you’re running into problems, watch the video a couple times or read the step-by-step below and it’ll start making sense in no time.
Brake Lever Part Number: 4138/39-LEVER
Why is Proper Rear Parking Brake Lever Adjustment Important?
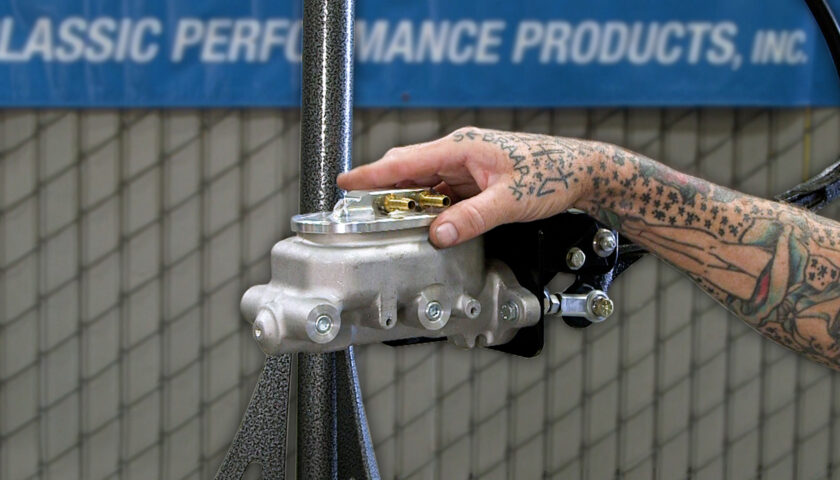
Adjusting the rear caliper lever is a critical step that many people miss when installing rear disc brakes. Our rear disc brake calipers are equipped with an integral self-adjusting parking brake. Regular use of the parking brake will compensate for pad wear. If you do not use your parking brake during normal operation you can expect the pads to wear and develop more of a gap between the rotor and the pads. This will make the pedal go lower to the floor. The parking brakes should be adjusted before the brakes are bled. Make sure to install emergency brake cables before adjusting the calipers.
Related Article: Improving the Stopping Performance of Your Chevelle
Failure to adjust the parking brake lever can result in no brakes, dragging brakes, overheating brakes, and premature brake wear. Lincoln-style calipers simply apply the parking brake several times until the parking brake can stop the car from rolling. If using the Cadillac-style caliper, follow this procedure:
How to Adjust Cadillac Caliper:
1. Tighten the rotor against the axle flange.
2. Install the caliper in its mounting bracket.
3. Remove the parking brake return spring.
4. Cycle the parking brake several times. Do this by moving the lever in the same direction the cable would pull it. This motion would compress the return spring if it were still installed. Some caliper assemblies may self-adjust by cycling the lever in this way, others may not it; simply depends on how much internal friction the parking brake assembly has compared to the friction caused by the piston seal.
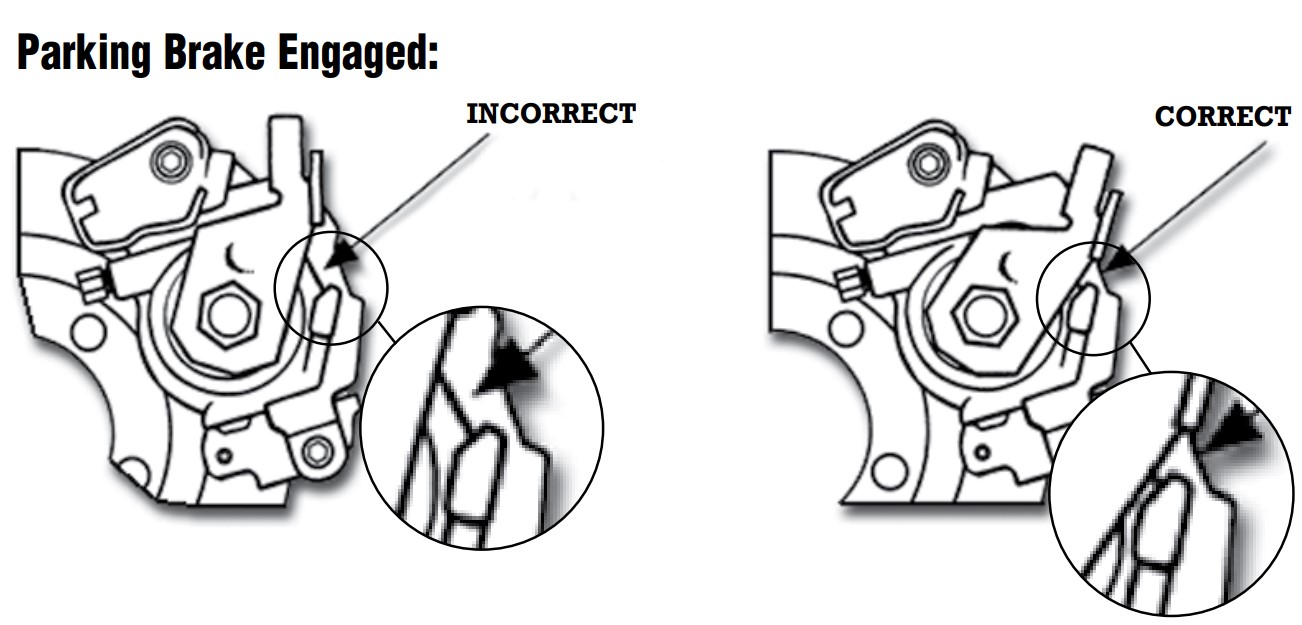
5. When the parking brake is adjusted correctly, the lever will only move 1/16″ to 1/8″ from the stop that limits the lever’s movement to the fully released position (see illustration below). If the parking brake is correctly adjusted, reinstall the return spring, and finish the installation. If the lever moves more than 1/8″, continue with the adjustment procedure.
6. Remove the nut, lever, seal and nylon washer from the adjusting screw that secures the parking lever to the caliper assembly. Place them in a clean location.
7. Temporarily attach the parking brake lever and position the lever against the stop. Without rotating the shaft the lever is attached to, remove the lever and mark the position of one of the points on the hexagon shaft.
8. Loosely install the nut back onto the lever shaft. Using a 9/16″ open end wrench turn the shaft in the direction opposite to the direction the cable pulls the lever. As you turn the lever, the shaft will move into the caliper housing until the wrench is snug against the nut and the caliper; as you continue to rotate the shaft, the internal ratchet mechanism within the caliper will begin to adjust. (You should be able to feel the resistance increase slightly once the ratchet mechanism begins to adjust.)
9. Once you have made an adjustment to the mechanism, turn the shaft in the direction to activate the parking brake. Using the wrench turn the shaft until the parking brake is applied. Check to see if the mark you made lines up with one of the points on the hexagon shaft. If not, continue to make adjustments until the mark lines up with of the points on the hexagon shaft.
10. Remove the wrench and nut from the shaft. Reinstall the lever in the correct position to work with the spring and cable. Do not install the nylon washer or the seal at this time. Further adjustment may be needed.
11. Using the lever, activate the parking brake. Check to see if the parking brake is now adjusted. The lever should not move more than 1/8″ from the stop. If the parking brake is not adjusted correctly, make another adjustment as explained in this step.
9. Once the brake is adjusted, reinstall the seal and nylon washer between the caliper body and the parking brake lever. Tighten the lever retaining nut, and reinstall the parking brake return spring.
Bleeding the System
Do not attempt to bleed the brakes until after the complete brake system as been dry fitted.