Regardless what model of Chevrolet performance vehicle you drive, the main link to transferring its power resides in the back half of your ride. Once the goods move through your driveshaft, it’s all up to the rearend, suspension, and brakes to make the magic happen. The last thing you need is a weak link when you’re ready to hit the go pedal on the street or track. If you’re driving an original car or one restored to factory specs, its fine to rely on the setup that was engineered for the driveline combination as the car rolled off the production line. However, if you’re planning to up the ante in the horsepower department with more cubic inches, a supercharger, or even turbos, it’s best to map out a plan to handle the increase as it moves out back. It’s a formula that’s served hot rodders for decades where the front-to-rear performance balance needs to be rock solid.
On our most recent visit to Procision Industries in Taunton, Massachusetts, we met with shop owner Pat O’Brien to address the next set of upgrades to the rear of his 1971 Camaro project car. The build focuses on an affordable LS-powered second-gen that could hold its own on the street as well as the autocross while not breaking the bank in the process.
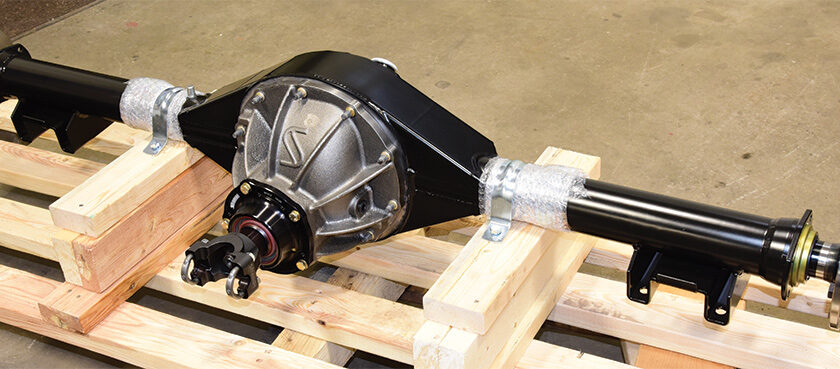
When making the decision to upgrade the tired, original factory, 10-bolt Chevy rear, O’Brien contacted Strange Engineering to custom build a rearend that would address all of his performance needs, including the new, more-powerful LS engine. To handle the job, he started with a Strange 9-inch Ford housing setup with late big Ford ends and leaf spring mounts, seeing as he made the decision to maintain the factory-style leaf spring setup. A Strange S-Series nodular iron centersection was matched to an Eaton Detroit Truetrac, 3.50:1 gears, 31-spline axles, chromoly yoke, and satin black powdercoating for the housing. The completed rearend was then crated, shipped, and ready for full installation once received.
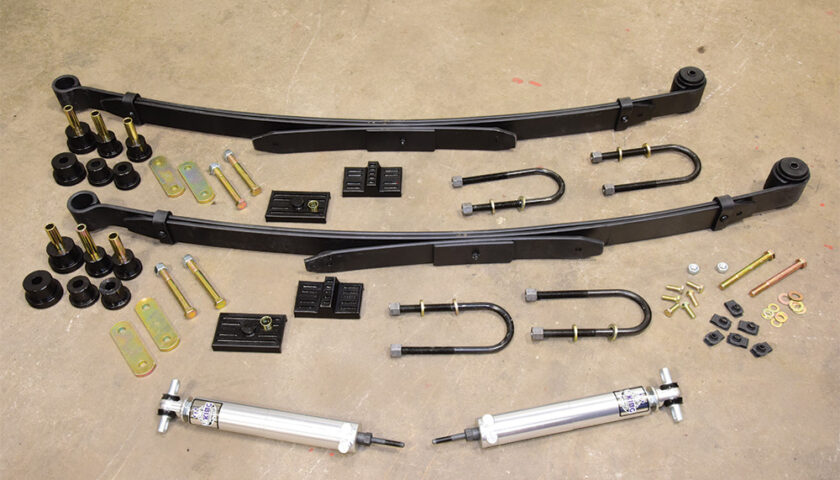
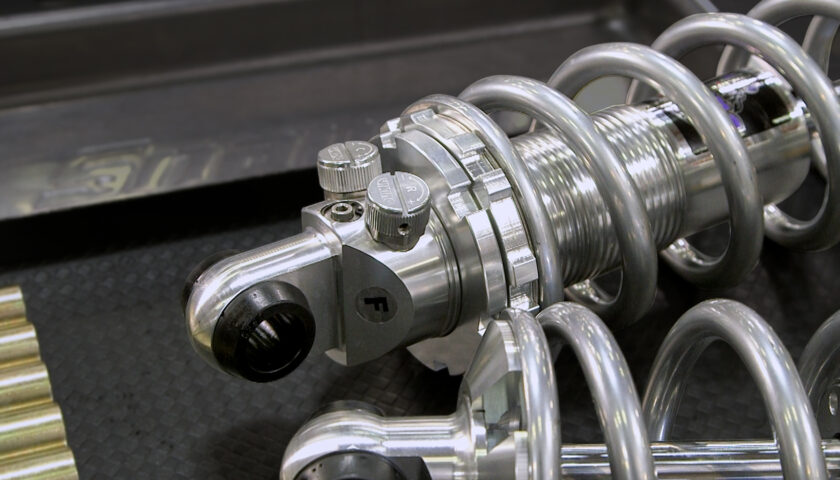
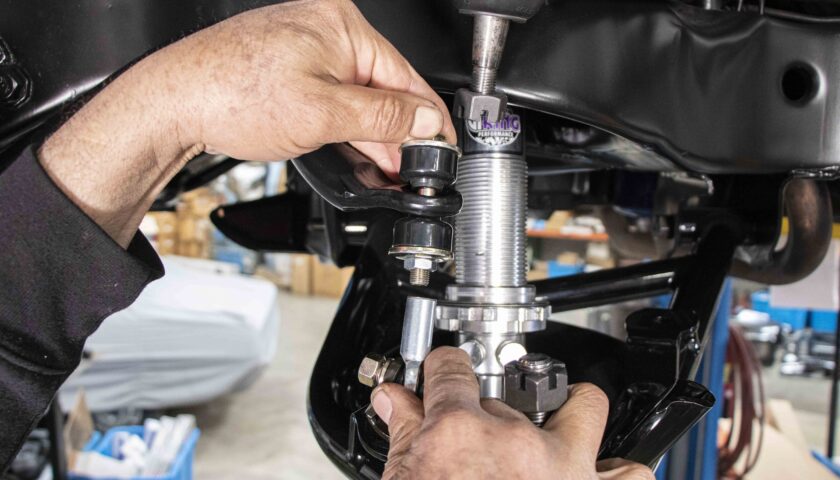
With regard to setting up the rear suspension, it was time to focus on the upgrades by installing the rear half of the Classic Performance Products (CPP) Pro-Touring kit. In this article we’re focusing on the rear portion of the complete Stage II kit, which includes replacement lowered leaf springs, double-adjustable Viking Performance aluminum shocks, and all necessary hardware. These shocks offer 19 different positions of compression and 19 different positions of rebound adjustment for a total of 361 different valve combinations.
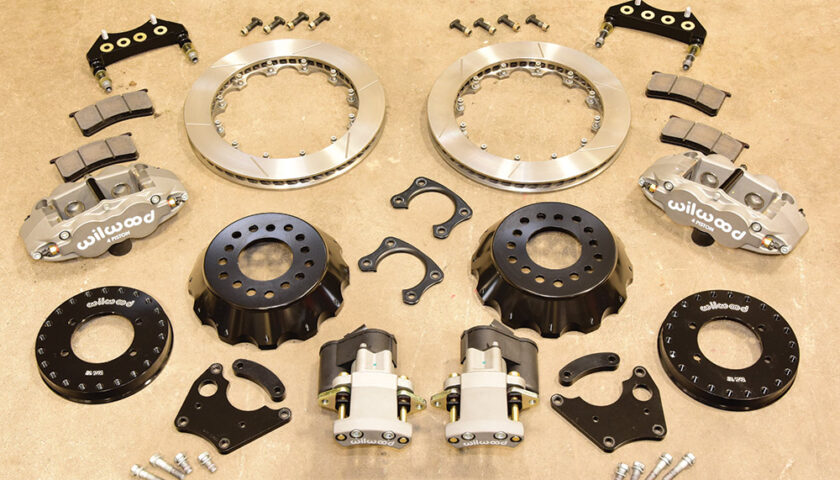
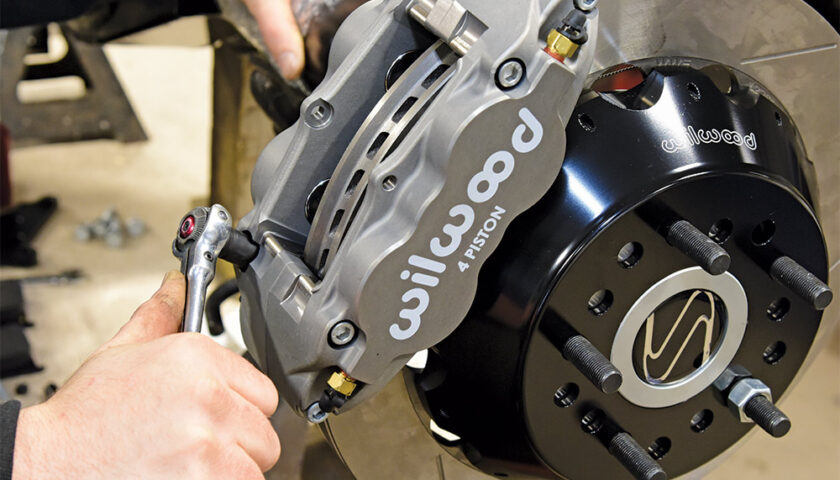
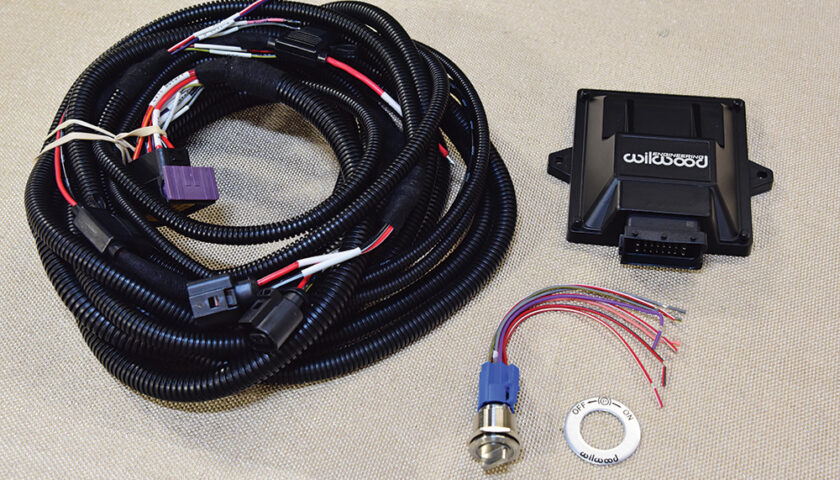
Finally, it was time to jettison the old factory drum brakes and bring the car into the new world with razor-sharp stopping power by contacting Wilwood Disc Brakes. To perfectly complement the Wilwood upgrades to the front of the car (covered in our last installment), O’Brien selected their Forged Narrow Superlite 4R Big Brake Rear Electronic Parking Brake kit. The kit packs a punch, featuring their Forged Narrow Superlite 4R four-piston calipers in Type III hard-anodized finish, GT slotted two-piece rotors, and electronic parking brake (EPB) caliper. The distinctive EPB caliper offers a high-torque static grip for parking without needing to incorporate the standard-style mechanical cable.
Let’s follow along as O’Brien brings this second-gen Camaro to the next level of performance.
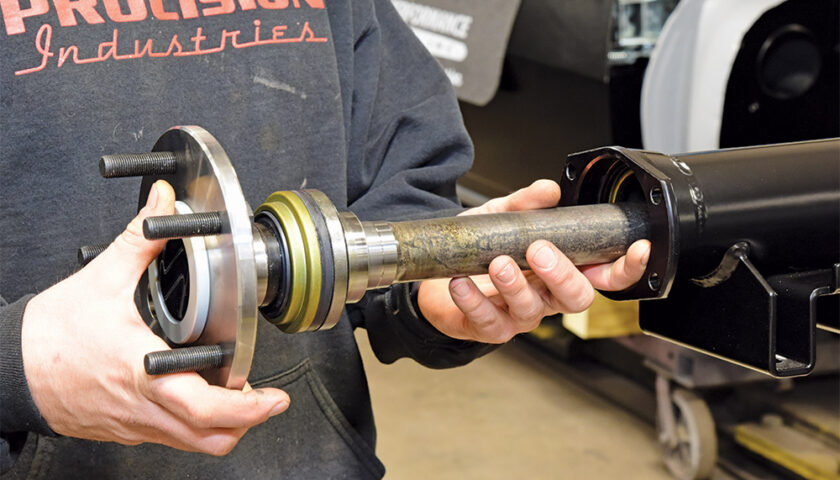
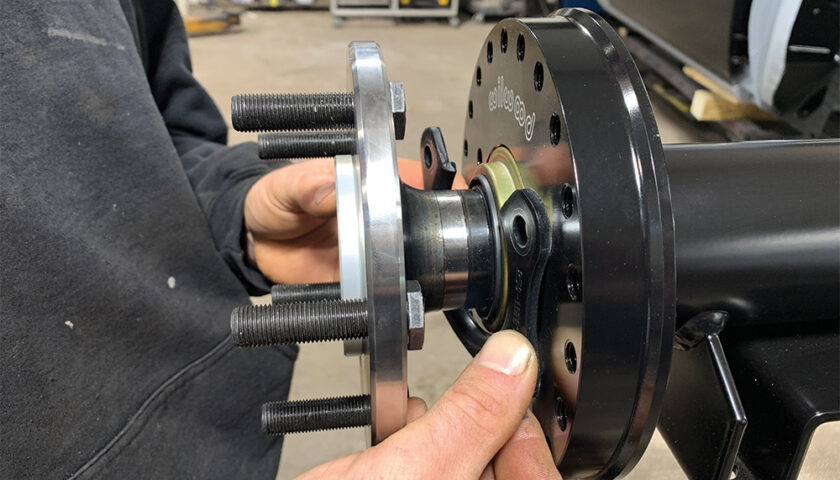
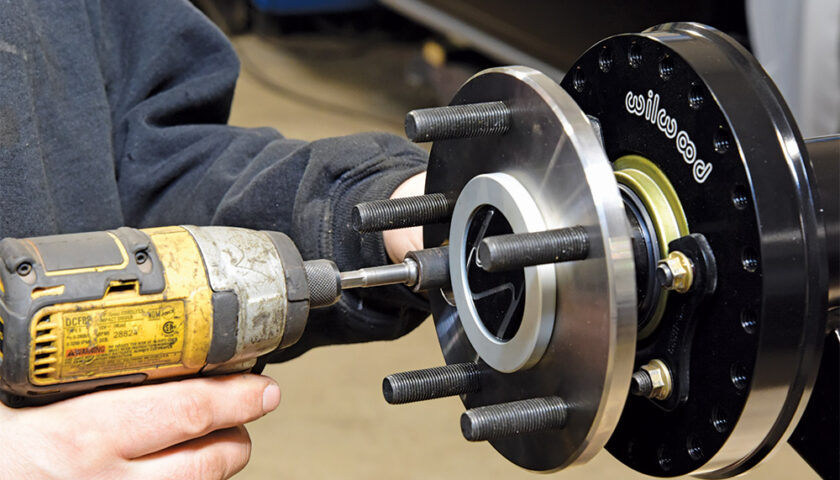
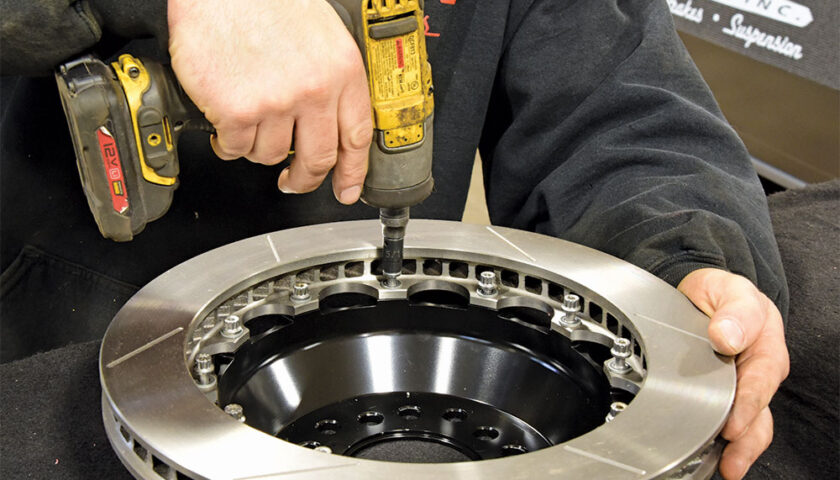
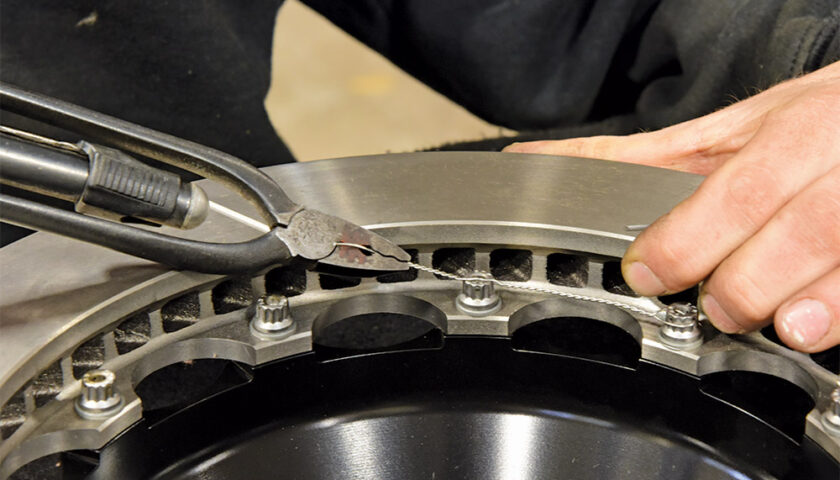
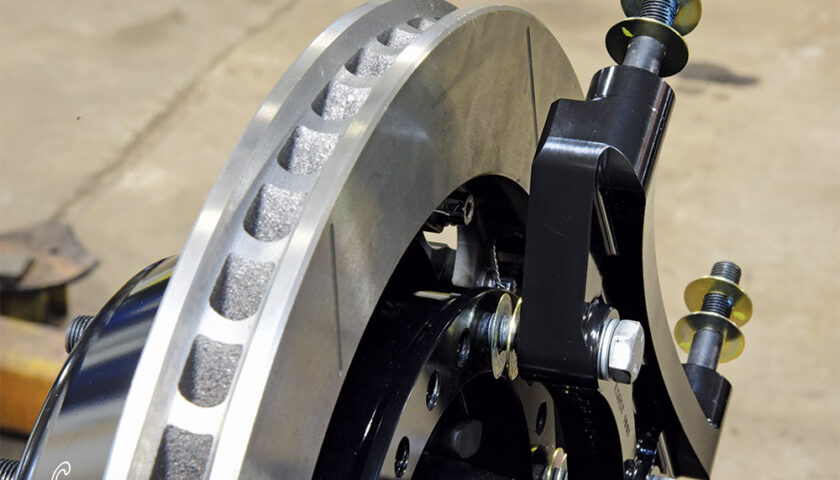
1. Strange Engineering assembled a rock-solid Ford 9-inch rear to replace the tired, original factory unit that had seen better days. The new satin black powdercoated assembly is packed with performance features, including their S-Series nodular iron case, Eaton Detroit Truetrac, 3.50:1 gears, and 31-spline axles.2. To prepare for the installation of the new Wilwood Disc Brake kit, Pat O’Brien of Procision Industries got started by first sliding out the new 31-spline axle from the housing. 3-4. Slide the Wilwood backing plate onto the axle housing flange, making sure that it fits flush against the flange and reinstall the axle into the housing. Follow by fitting the bearing retainer in place with the opening facing upward and the lip facing inward toward the bearing. Secure into place with the original OEM T-bolt hardware set to factory torque specs after coating bolt threads with Loctite 271 (red).5. For excellent stopping power, O’Brien selected the Wilwood Disc Brakes Forged Narrow Superlite 4R Big Brake Rear Electronic Parking Brake kit. The setup incorporates their Forged Narrow Superlite 4R four-piston calipers in Type III hard-anodized finish, GT slotted two-piece rotors, and electronic parking brake (EPB) caliper.6. Before assembling the GT slotted rotor to the hat, it’s important to first apply a coating of Loctite 271 (red) to all of the threads and then hand-thread the bolts in place. Next, follow by tightening them in place using an impact gun in an alternating sequence and final torque to 155 in-lb.7. For added protection, O’Brien safety wired the bolts using a standard 0.032-inch-diameter stainless steel safety wire. 8. Slide the rotor assembly onto the axle flange and secure in place (finger tight) with three lug nuts. The service caliper mounting bracket was then mounted to the backing plate with threads coated with Loctite 271 (red). Note that two shims (0.035) were installed on both upper and lower mounting points between the bracket and backing plate prior to final tightening to 35 lb-ft.9. Next, secure the caliper to the service caliper mounting bracket with the provided hardware. Be sure to place two shims (0.035) on each mounting stud, center the caliper onto the rotor for proper alignment, and lubricate threads on the mounting bracket. Follow by installing the brake pads.10. With the mounting position of the EPB determined, secure the spacer and EPB mounting bracket in place with the supplied hardware. Coat the bolt threads with Loctite 271 (red) and torque to 35 lb-ft.11. Follow by mounting the EPB caliper in place, coating bolt threads with Loctite 271, and torque to 30 lb-ft.12. The completed install of the new Wilwood Forged Narrow Superlite 4R Big Brake Rear Electronic Parking Brake kit will add an amazing level of braking performance especially when combined with the holding power of their EPB.13. To complete the kit, Wilwood includes everything you’ll need to bring their EPB to life. Pictured here you can see the full wiring harness, EPB control unit (ECU), switch connector, and faceplate.14. To up the ante for wicked handling, we selected the CPP Stage II Pro-Touring kit available for the 1970-1981 Camaro. The kit features a combination of lowered leaf springs, double-adjustable Viking Performance aluminum shocks, and all necessary installation hardware.15-16. O’Brien got started by installing the new U-bolts to the spring perch mount and followed next with the supplied upper isolator pad, lowering spring, lower isolator pad, and lower spring perch plate. The combination was then secured with fresh washers and bolts using an impact gun.17. We upgraded our Stage II Pro Touring kit with CPP’s rear adjustable 1¼-inch rear sway bar featuring billet ends for additional shock mount clearance.18. To prepare the bar for mounting to the rearend, O’Brien installed the POLYPLUS pivot bushings with the supplied grease and followed with the billet mounting brackets.19. The sway bar was then mounted to the rearend housing with the provided lower brackets and hardware, making sure that it’s properly centered. Also, be sure to install the provided (by Strange Engineering) Lucas Heavy Duty High Performance SAE 85W-140 gear oil into the rearend.20. O’Brien followed by installing the provided leaf spring bushings (properly greased) and rear spring shackles to prepare the rearend for installation.21. Here you can see the Strange Engineering Ford 9-inch rearend complete with Wilwood Forged Narrow Superlite 4R Big Brake Rear Electronic Parking Brake kit installed along with the CPP lowered leaf springs and adjustable sway bar ready for final installation.22. The front leaf springs were secured in place using the factory spring mounting cup bracket followed by securing the rear leaf springs in the stock shackle mounting location with the supplied Grade 8 hardware.23. The double-adjustable aluminum Viking Performance shocks were then installed and can be seen here with the final orientation of the four-piston caliper and EPB from Wilwood.24. Position the endlink mounting plate to the bottom of the chassis above the sway bar end. Locate the plate flush to the end slot of the bottom of the chassis. Using the plate as a guide, drill three 3/8-inch holes followed by inserting the nut tab through the end slot and secure in place with the provided Grade 8 hardware.25-26. Follow by installing the endlink to the mounting plate and sway bar using the provided hardware and spacer.27. Here you can see how well-engineered and perfectly balanced the CPP adjustable rear sway bay is now that the installation is complete.28. CPP’s Totally Tubular Subframe Connectors are a perfect solution to eliminate chassis-flex under high-performance conditions. Made from round tubing to resist torsional twist, they are 100 percent bolt in and come with all mounting hardware.29. Start by removing the inner bottom leaf spring mounting cup bracket bolt, which will be replaced by a larger bolt and spacer in the kit. Use the subframe connector to mark mounting points to drill at both ends.30. Using a step drill bit, you can see the mounting access holes being drilled into the rearmost portion of the front subframe.31-32. With the drilling completed, the supplied short U-bolts were placed into position and secured in place using the supplied Grade 8 hardware.33. The CPP Totally Tubular subframe connectors not only look great in their gloss black powdercoating, they’ll add plenty of strength to eliminate any chassis flex.34. It’s all business out back with the combination of a Strange Engineering Ford 9-inch now in place with plenty of high-performance braking power and Pro-Touring suspension updates from CPP to raise this second-gen Camaro to the next level. Stay tuned as we’ll be addressing the driveline in upcoming issues.