For decades we trusted single-reservoir master cylinders on our daily drivers and our street rods, but the thought of evacuating all of your brake fluid due to an aging or faulty wheel cylinder, brake hose, or brake line issue is frightening. Our 1964 Chevelle was built toward the end of the single-reservoir era, as dual-reservoir master cylinders would become the industry standard just a few years later. The same principles apply to many popular platforms, such as the Tri-Five Chevy and pretty much any car or truck built before 1967.
The braking system on our Chevelle project car never gave us any signs of failure, but for safety purposes we decided to proactively upgrade our master cylinder. Classic Performance Products (CPP) offers a kit that not only converts the car to a dual master cylinder, but also converts it to power brakes. The brake booster offsets the increased pedal effort from the larger bore inside the master cylinder.
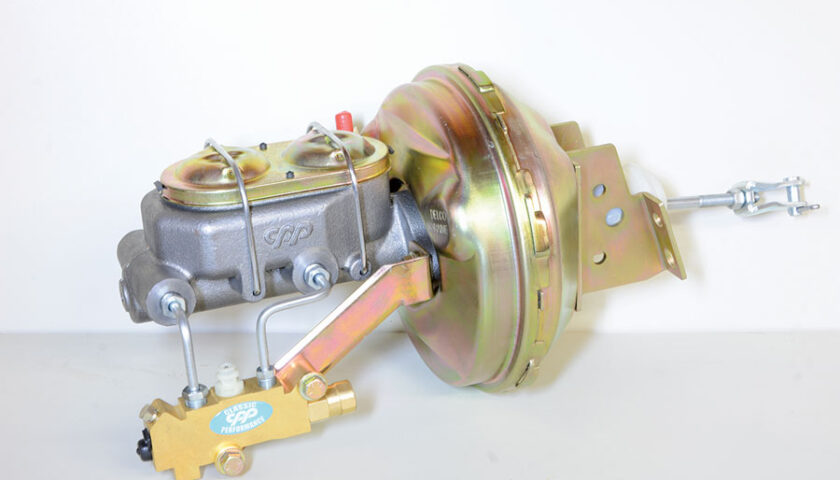
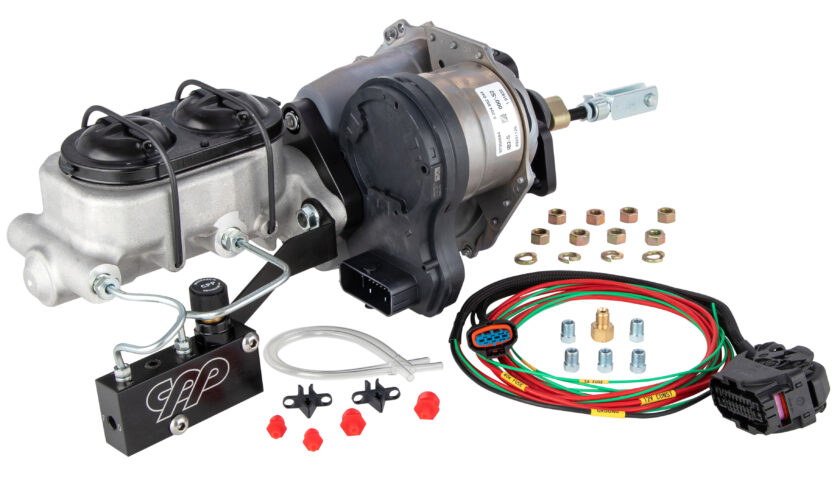
We used a CPP master cylinder kit (PN 6474BB2), which is a direct bolt-on kit for cars using disc brakes up front and drums out back. The kit includes a cadmium-plated brake booster (you can choose the size but we went with the 9-inch booster), brackets for bolting directly to your stock firewall, a new dual-reservoir master cylinder, pedal pushrod and clevis, pre-bent hard lines, and a new proportioning valve and bracket assembly. One additional item that makes this installation easier is a new hard brake line kit. In the case of our Chevelle, we used a Right Stuff kit from Summit Racing (PN COP64H2), which works for 1964-1967 Chevelles with power disc brake conversions. Overall, our brake booster and master cylinder upgrade only took a few hours (most of which was spent installing the new lines), and set us back about $400, including the new brake lines and brake fluid. Follow along as we install the kit, which gives us added confidence and comfort when it’s time to slide behind the wheel of our weekend cruiser.
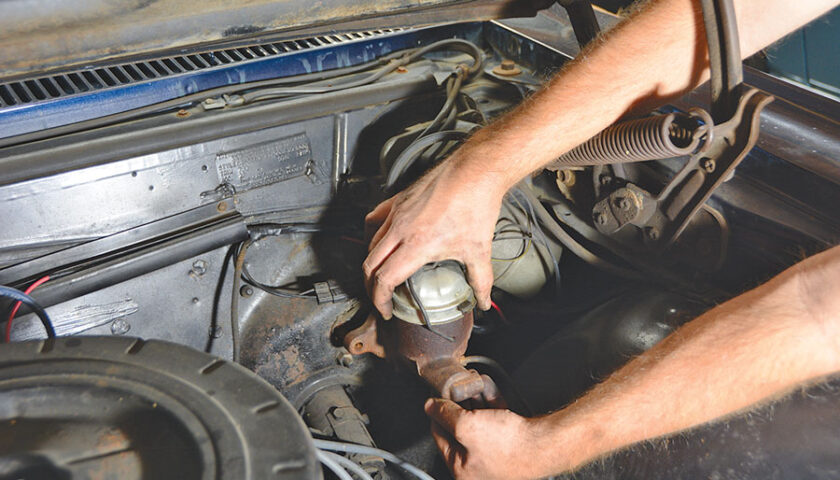
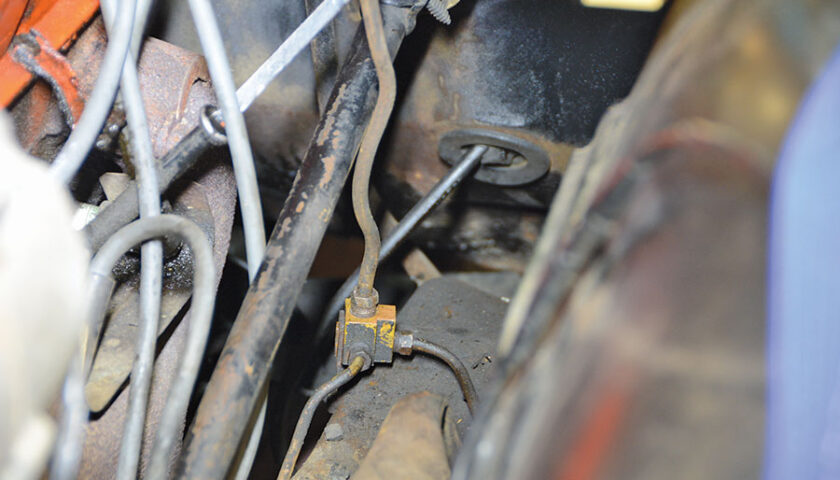
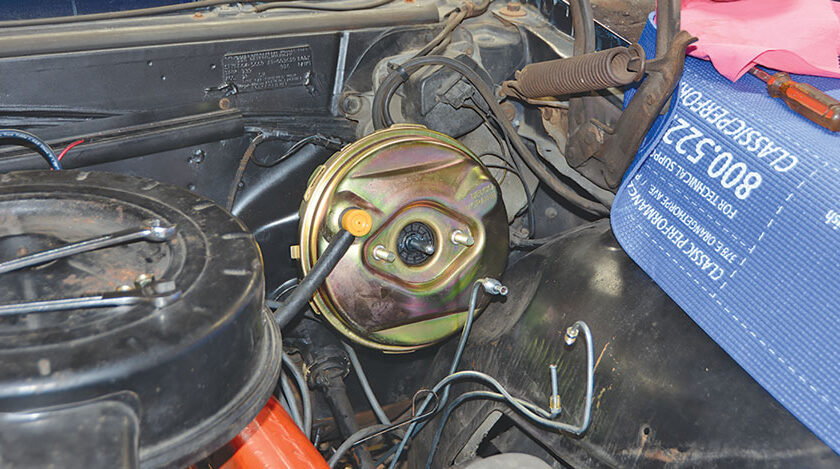
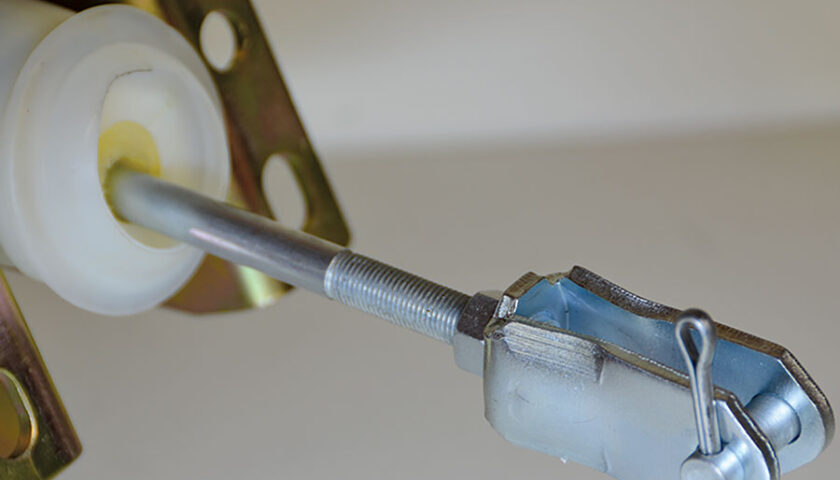
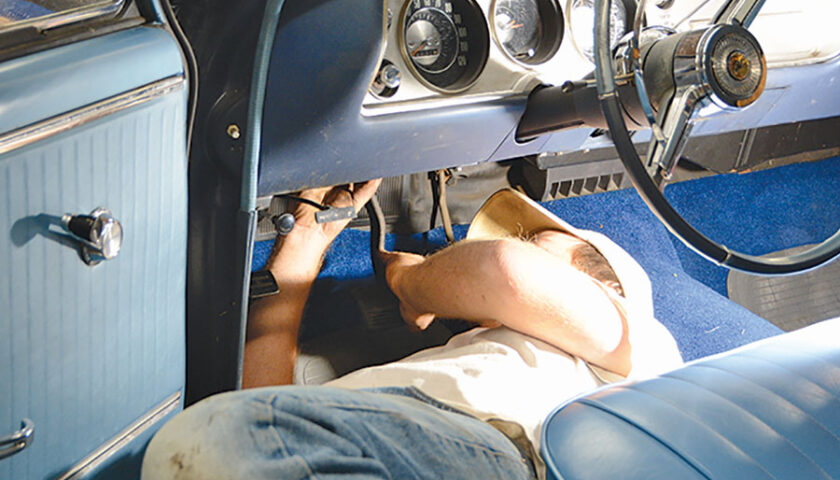
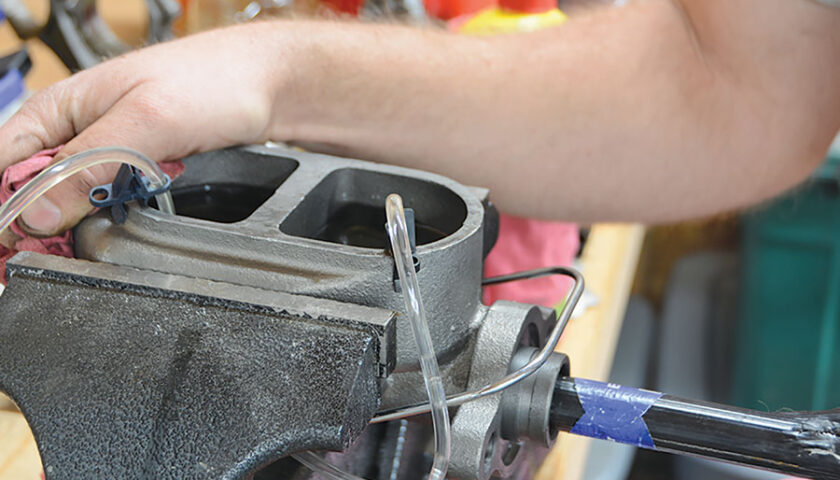
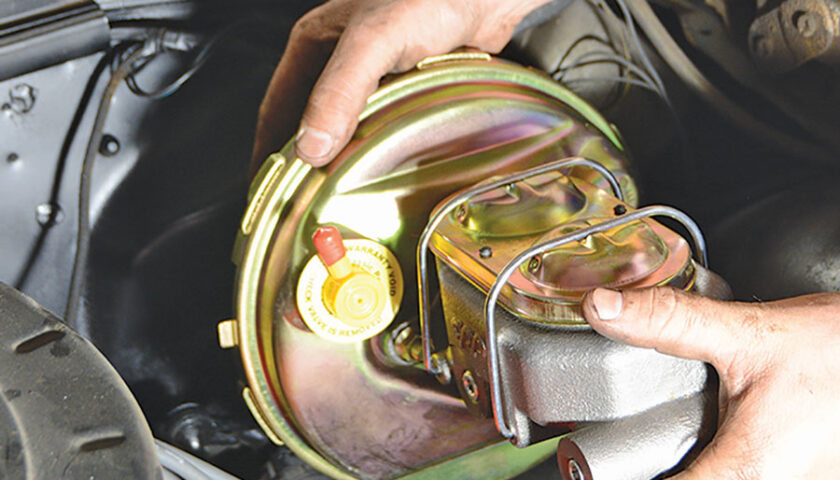
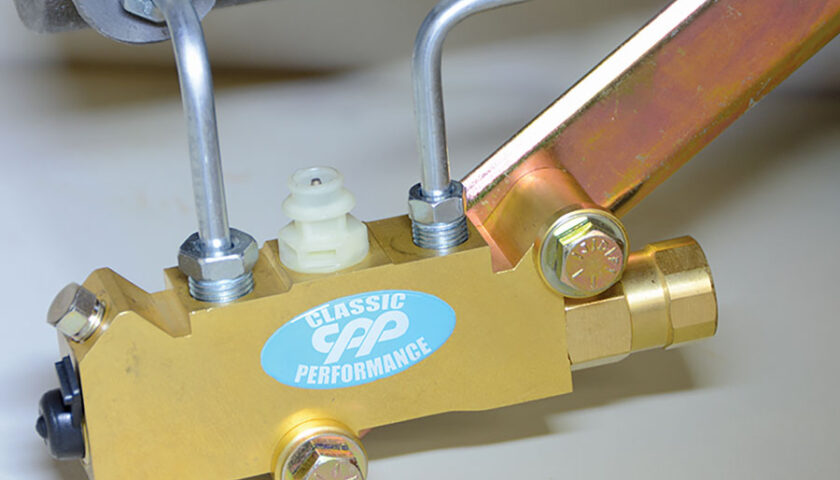
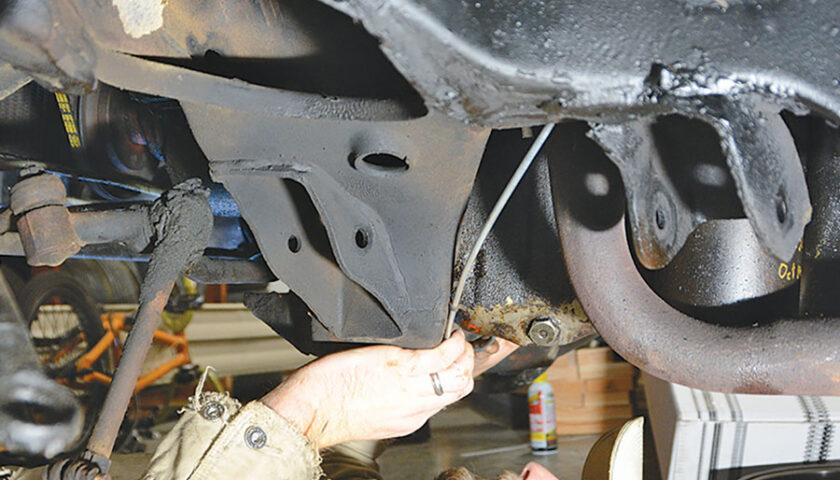
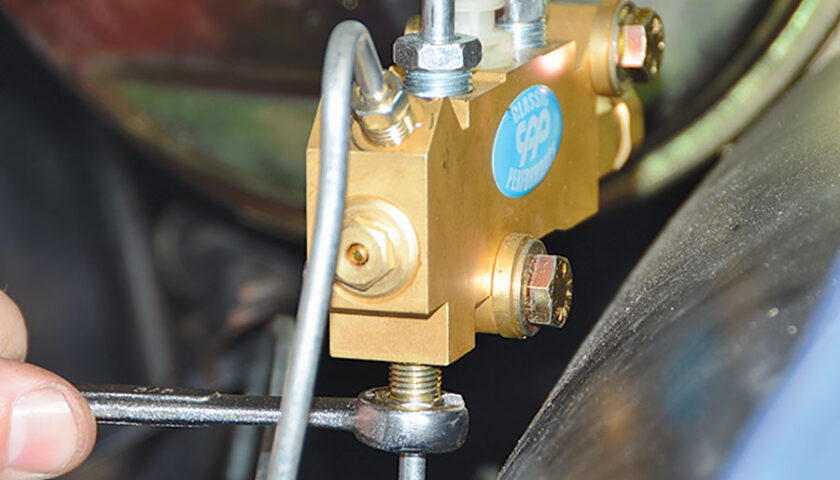
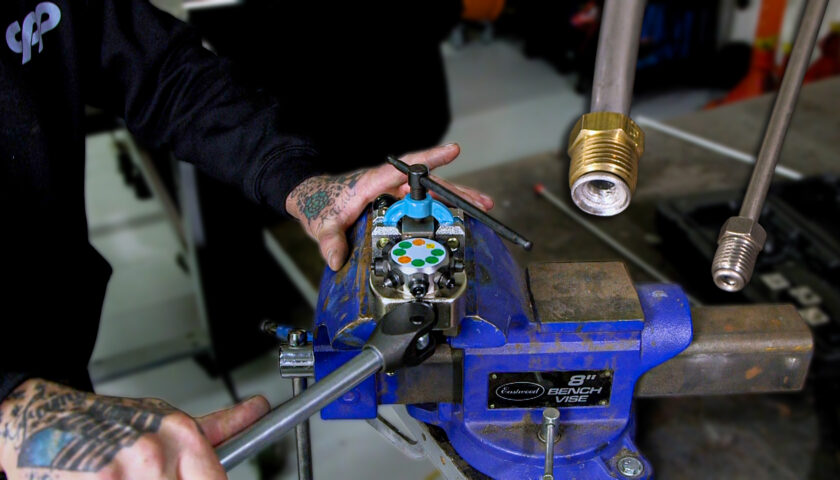
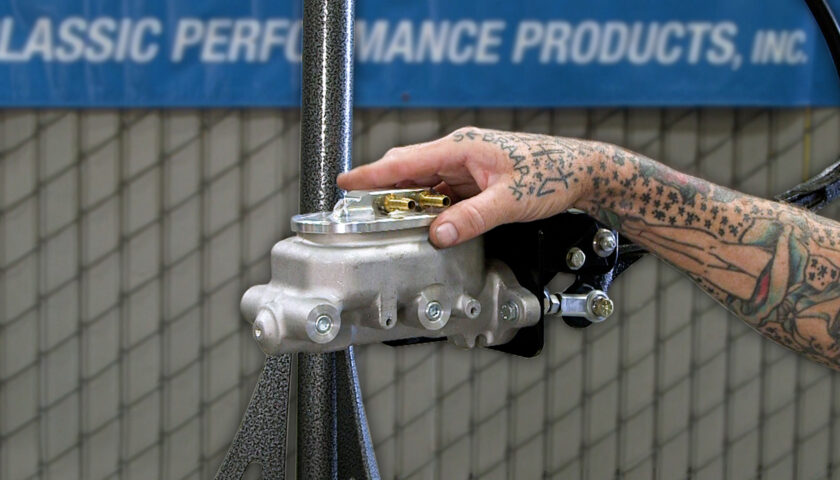
01 Our starting point was a crusty, single-reservoir master cylinder. Removing the old master cylinder involves removing the two retaining nuts on the firewall and removing the single brake line. 02 The original brake distribution block features a single inlet and three outlets (two front lines and one rear line). We’re going to remove the block and original lines, replacing with new ones designed specifically for disc brake and dual master cylinder upgrades. 03 The CPP Firewall Booster kit (PN 6474BB2) includes a cadmium-plated booster, with 3/16-inch steel brackets that fit nicely on the stock firewall. Also included is a CPP dual-reservoir master cylinder, pre-bent lines, a proportioning valve and bracket assembly, and a new pushrod and clevis. 04 Even though the CPP kit comes assembled, we took it apart to bench bleed the master cylinder and give us more room. The brake booster bracket slides over the original studs and we tighten the original nuts. 05 Although it’s hard to see when installed, this is a time-saving part of the CPP kit, a brand-new pushrod and clevis. This takes all the guesswork out of going from a manual brake setup to our new power brake booster. The rod can be adjusted to your preference. 06 Our Chevelle has plenty of room to slide under the dash for the pedal pushrod and clevis installation. Always be sure that the pedal is returning enough to make contact with the brake light switch under the dash. 07 To bench bleed the master cylinder, we clamped it in a vise, filled it with fluid, and used an old broom handle to move the piston in and out very slowly. The clear tubes allow us to see the air trapped in the lines, and we slowly pump until the bubbles are gone. You can sometimes bench bleed a master cylinder in the car, but only when the master cylinder sits level. 08 After bench bleeding, we can slide the master cylinder over the two studs on the brake booster. We tighten the nuts provided in the kit. Later, we can pop the cad-plated lid off the master cylinder and top off the fluid. 09 Another time-saver is this proportioning valve, which includes the appropriate bracket and pre-bent hard lines that run between the master cylinder and valve. Sure, you can buy piece by piece, but CPP makes it easy and affordable with a complete kit. 10 Brake lines are inexpensive for most applications, but they do require some dirty work. This old Chevelle has a tired 283 that keeps the undercarriage well lubricated, so our brake line install was a little greasier than most. We used a hard line kit from Summit Racing (PN COP64H2), which is designed for use with power disc brake conversions on 1964-1967 Chevelles. 11 After a few tweaks to align the new lines with the proportioning valve, we threaded the new fittings into place and tightened them with a line wrench.
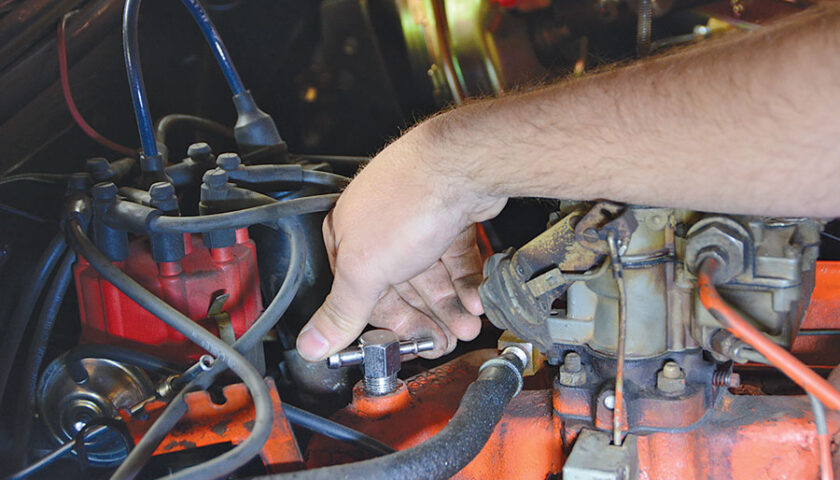
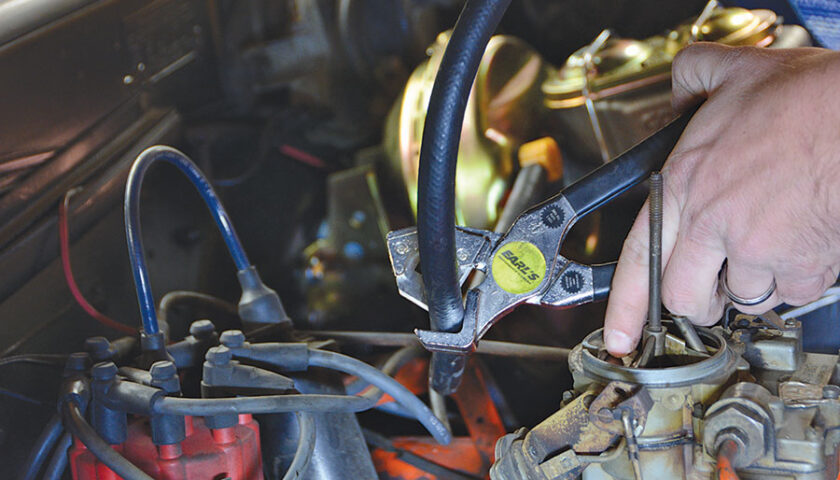
12 The brake booster is fed by a vacuum from the engine. We installed a CPP manifold vacuum fitting (PN IN38RS), which threaded directly into our two-barrel intake manifold. Most manifolds have an adequate port for a vacuum source, or you can sometimes use the large port on the back of your carburetor.